Setting Up Your First Node.js Application Step-by-Step
Starting with Node.js is much easier than most beginners expect. One of the reasons Node.js became so popular is that you can install it, write a JavaScript file, and run your first backend application within minutes.
In this article, we’ll go step-by-step through the complete setup process. You’ll learn how to install Node.js, verify the installation, understand the Node REPL, create your first JavaScript file, and finally build a simple “Hello World” server.
The goal here is not to build a complex project, but to understand how Node.js actually runs JavaScript outside the browser.
Installing Node.js
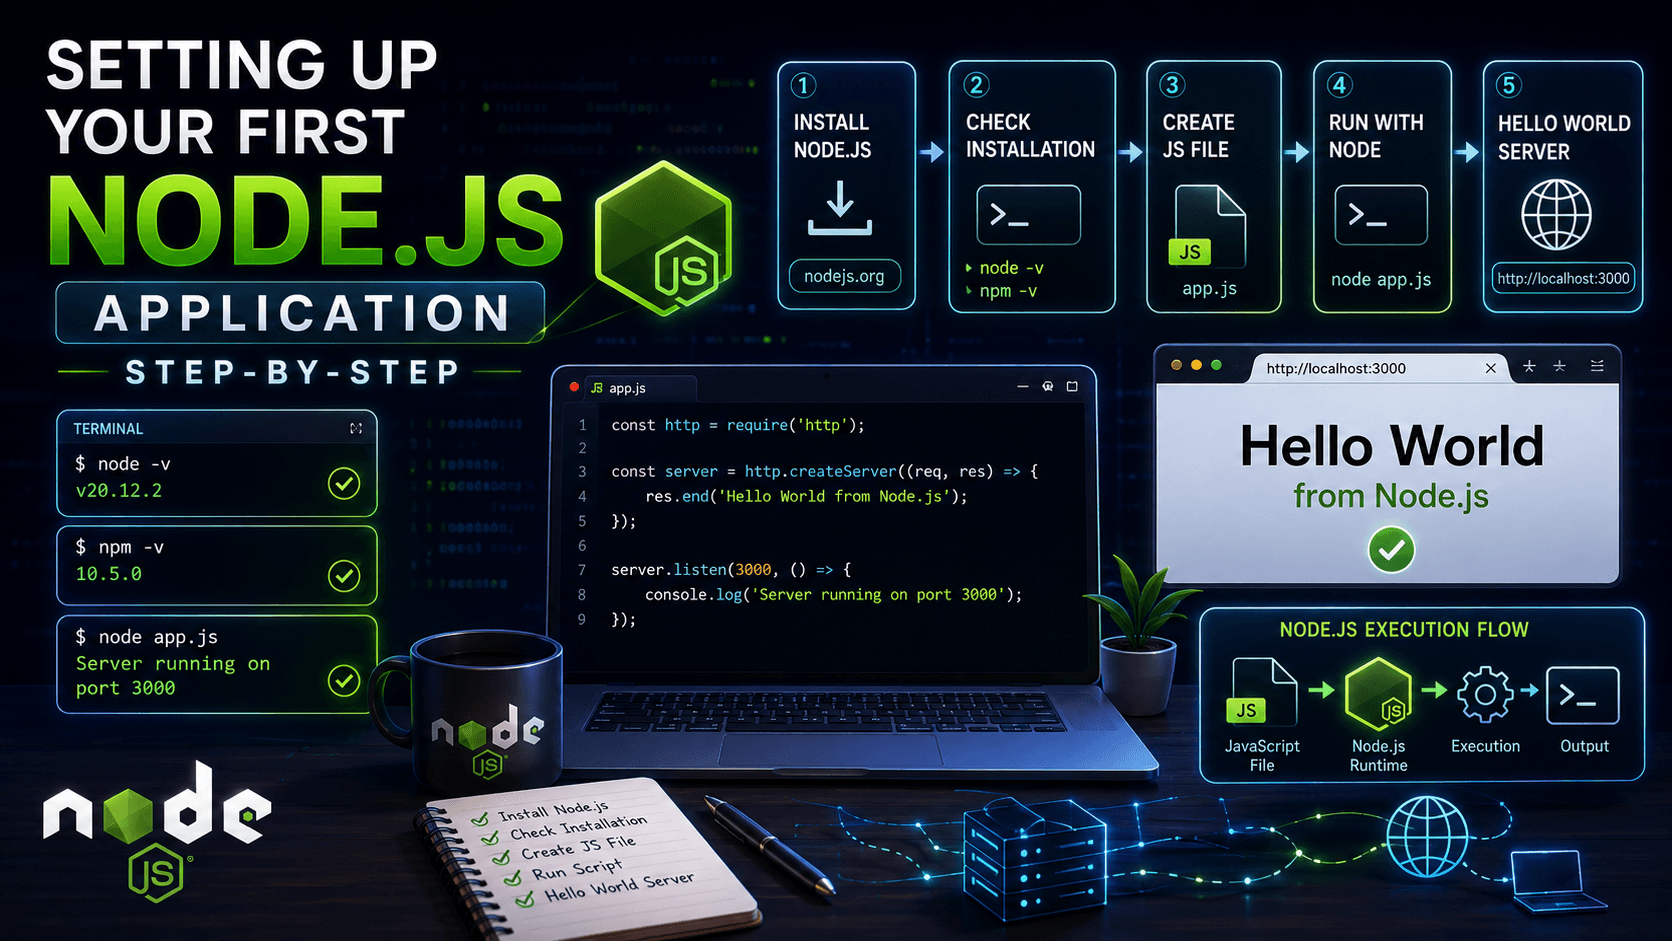
The first step is installing Node.js on your system.
When you install Node.js, two important things get installed:
the Node.js runtime
npm (Node Package Manager)
npm helps developers install libraries and tools later, but for now we’ll focus mainly on Node.js itself.
To install Node.js, go to: Node.js Official Website
You’ll usually see two versions:
LTS (Long Term Support) → stable and recommended for most users
Current → latest features but less stable
For beginners, the LTS version is the safest choice.
The installation process is mostly straightforward regardless of whether you use Windows, macOS, or Linux. Download the installer, follow the setup instructions, and Node.js will be added to your system.
Checking the Installation Using Terminal
After installation, it’s important to confirm that Node.js is working correctly.
Open your terminal or command prompt and type:
node -v
If Node.js is installed properly, you’ll see something like:
v22.5.1
This command simply shows the installed Node.js version.
You can also check npm using:
npm -v
This confirms that the Node Package Manager was installed successfully as well.
At this point, your system is ready to run JavaScript outside the browser.
Understanding the Node REPL
Before creating files, it’s useful to understand something called the Node REPL.
REPL stands for:
Read
Evaluate
Print
Loop
It’s basically an interactive Node.js environment where you can write JavaScript directly in the terminal and instantly see the result.
To start the REPL, simply type:
node
You’ll enter an interactive mode that looks something like this:
>
Now you can write JavaScript directly.
Example :
> 2 + 3

> 5  // output
You can also test variables and functions:
const name = "Rohit";

console.log(name);
The REPL is extremely useful for quick testing and experimentation because you don’t need to create separate files every time.
To exit the REPL press ctrl + c twice, or type:
.exit
Creating Your First JavaScript File
Now let’s create an actual Node.js program.
Create a new folder anywhere on your computer. Inside that folder, create a file called:
app.js
Open the file in your code editor and write:
console.log("Hello from Node.js");
This is your very first Node.js application.
Even though the code looks simple, something important is happening here:
JavaScript is now running outside the browser.
There’s no HTML page, no browser console, and no frontend UI involved.
Node.js is directly executing the JavaScript file on your system.
Running the Script Using the Node Command
To execute the file, open the terminal inside your project folder and run:
node app.js
You should see:
Hello from Node.js
This is the basic Node.js execution flow:
  JavaScript File
         ↓
  Node.js Runtime
         ↓
  Execution
         ↓
  Terminal Output
The node command tells the Node.js runtime to execute the specified JavaScript file.
This is the foundation of every Node.js application.
Writing Your First Hello World Server
Printing text is useful for understanding execution, but one of the biggest reasons developers use Node.js is to create servers.
Now let’s build a simple web server.
Replace the contents of app.js with this code:
import http from 'http';

const server = http.createServer((req, res) => {
  res.end("Hello World from Node.js");
});

server.listen(3000, () => {
  console.log("Server running on port 3000");
});
At first, this code may look unfamiliar, but the idea is simple.
We are:
importing Node’s built-in HTTP module
creating a server
sending a response
starting the server on port 3000
Now run the file again:
node app.js
You’ll see:
Server running on port 3000
Open your browser and visit:
http://localhost:3000
You’ll see:
Hello World from Node.js
And just like that, you created your first backend server using Node.js.
Understanding What Happened
When the browser visited localhost:3000, it sent a request to your Node.js server.
The server received the request, processed it, and sent back a response containing:
Hello World from Node.js
This is the same basic idea behind APIs and backend applications. Real-world applications become much more complex, but the core request-response cycle remains the same.
Node.js Execution Flow
Here’s a simplified flow of what happens internally:
  Browser Request
         ↓
  Node.js Server
         ↓
  Request Handler Executes
         ↓
  Response Sent Back
         ↓
  Browser Displays Result
Understanding this flow is extremely important because nearly every backend application works using this same principle.
Conclusion
Setting up your first Node.js application is an important milestone because it introduces the core idea behind Node.js:
JavaScript can run outside the browser.
In this article, you learned how to:
install Node.js
verify the installation
use the Node REPL
execute JavaScript files
create your first server
More importantly, you saw how Node.js takes a JavaScript file, executes it through the runtime, and turns it into a working backend application.
And that’s where the real Node.js journey begins.